
We wanted to live in the city limits, close enough to bike into Winona for shopping and events. This meant we needed to abide by any city zoning limitations. Having no back yard, and with all the solar access in the front yard, we needed to apply for a variance. In Winona solar panels are in the same class as utility sheds, and only allowed in side or back yards. Luckily, and with very supportive neighbors we were granted a variance.
So many efficiencies can be done in new construction, and we looked at the available lots in Winona with that in mind. We found some with solar access, but many of those had neighborhood covenants that would not have allowed us to put in solar systems. We ultimately chose to remodel, finding an older and somewhat ‘non-traditional’ neighborhood where barns, sheds, clotheslines, and even chicken coops were allowed.
The house we settled on was very solidly built in 1965, and had very little updating to its infrastructure. Perfect for us, since we were going to move doors, walls, windows, replace the heating systems and appliances.
 Site Selection details
Unshaded solar access during the window of 9am to 3 pm summer through winter is critical to active and passive solar systems. The figure to the left illustrates the suns path during winter and summer as seen from the earth. The sun rises further to the south, and less high in the sky during winter. One needs to make sure that during those winter months taller objects such as trees, nearby buildings, or a bluff are not shading the location of solar panels
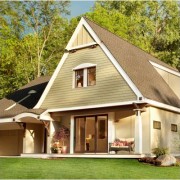
In our case we found a home on the lower slope near the foot of a bluff, oriented to the south (about 15 degrees east of south) and with good access during the solar window.
The Solar Pathfinder (photo on the right) is a low tech tool used to determine shading during the solar window. The dome reflects objects around the site to the horizon, and a grid inside, specific to the sites latitude is used to identify how much shading will occur during daylight hours and for each month of the year. 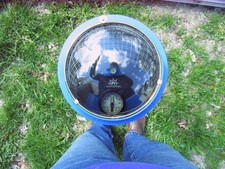
Our access was hindered in early morning by trees, and to a slight degree on the west at evening, but the critical 9-3 window was open.
Other Considerations
Energy Efficiency
 Most people don’t realize that they can likely cut their energy consumption by a third by just utilizing cost effective conservation measures. Before we even considered active solar systems we were looking for ways to conserve energy. This page will show you the various options available to most homeowners. Our efforts actually came closer to 60% from conservation. The more you know the more you can save.
If you plan to install a solar electrical system, take note that it’s usually from $1 – $3 cheaper a watt to implement energy efficiencies than it is to buy PV, so monitor your energy usage first. Look at the items that usually take the most electricity, such as water heating, electrical heat, refrigeration, dehumidifiers, and air conditioning.
Here are the most common areas to look to for conservation: Building Envelope Appliances Windows Phantom Loads Energy Monitor Lighting Low Flow Water Heads Low Flow Toilets.
 Building Envelope
A tight and super-insulated building envelope is one of the keys to passive solar, but also to effectively saving the heat or electricity you create with your active solar systems.
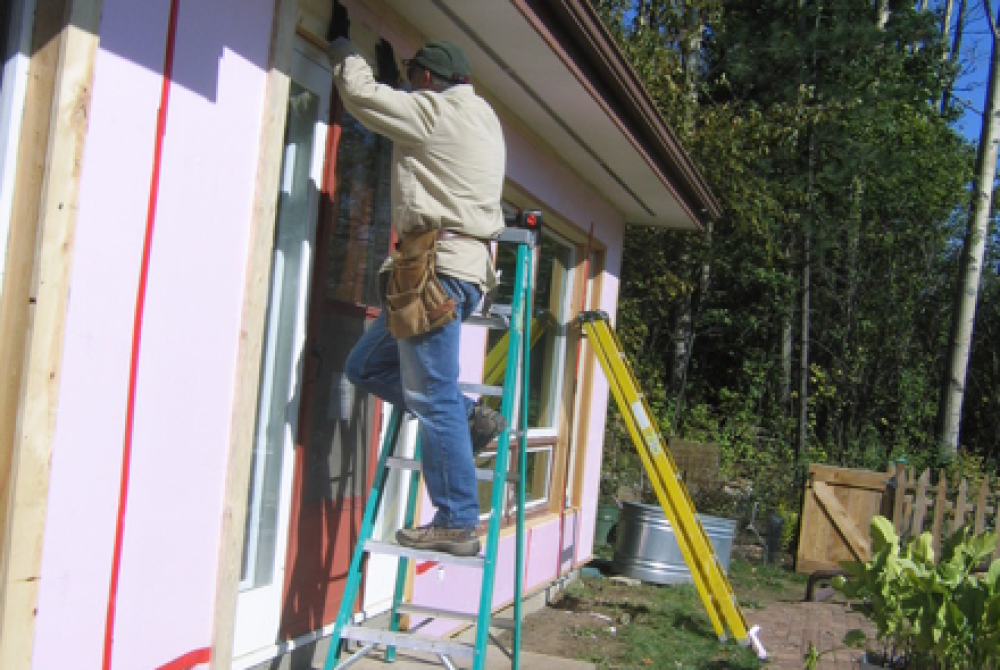
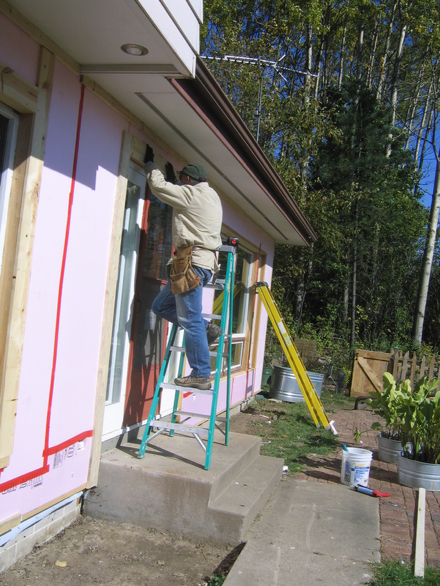
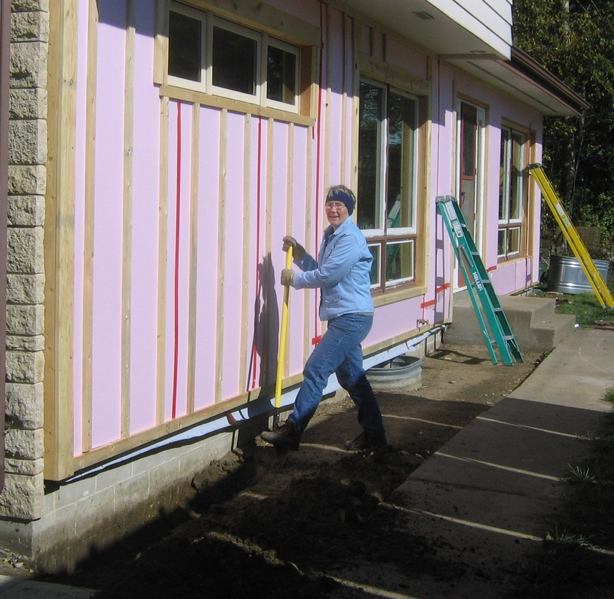
Our home started out with standard 2 by 4 construction, insulated as appropriate in 1965. We added an exterior house wrap (Tyvek) and 3 inches of polyisocyanurate, the rigid pink sheets of insulation, before residing. The pink sheets add about R5 per inch, bringing the walls to about an R31. An additional 8 inches of fiberglass batting was added to the existing 6 inches already in the attic, bringing our attic to around an R40.
We had closed cell spray foam insulation added inside to the rim joist. And we dug down a couple of feet around the foundation, placing 2 inch think sheets of textured polyisocyanurate against the walls, which we then backfilled.
 Take advantage of the Sun’s energy by building or remodeling to incorporate building characteristics that absorb or shade the Sun.
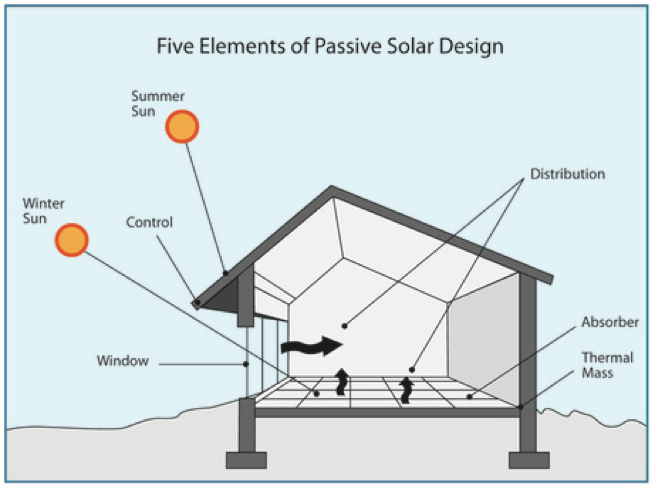
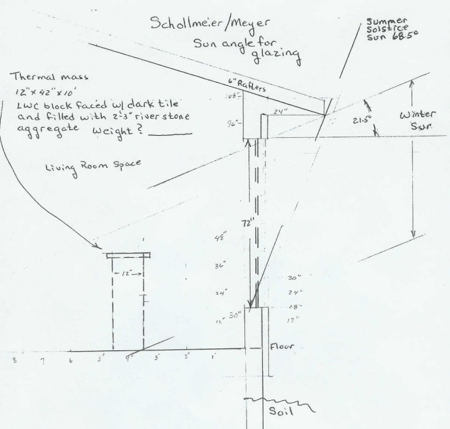
Glazing or Windows – Incorporate glass on south facing exterior walls that have a high solar heat gain coefficient (SHGC). Ideally, 10% of your home’s conditioned floor area should be south facing glass. We used a Marvin Low E 179 window. As you can see from the diagram Winter and Summer Sun angle are managed by a generous soffit to prevent over heating the living space during warmer months.
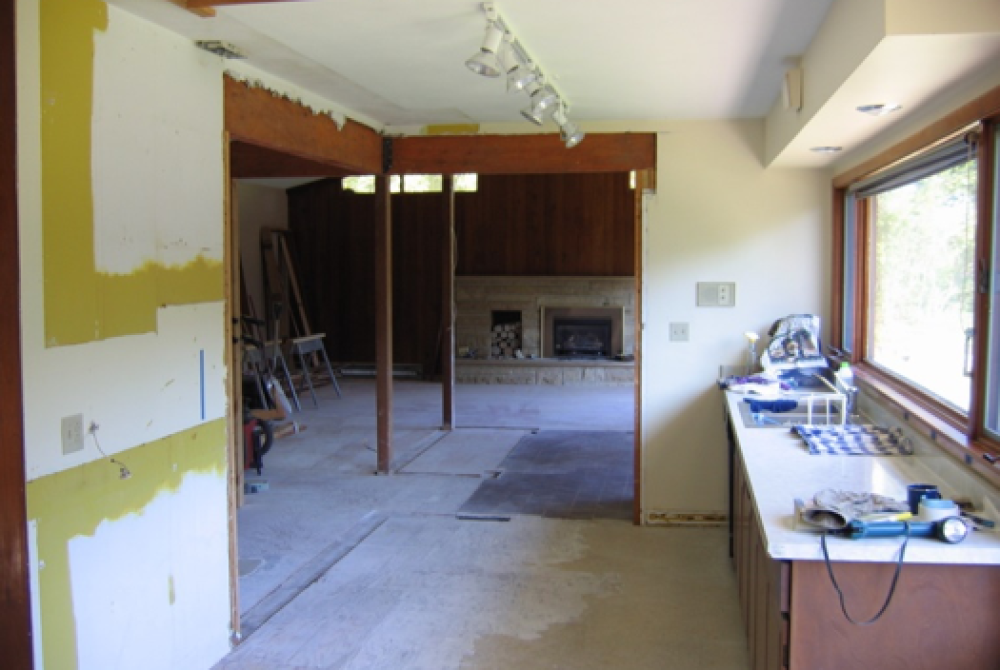
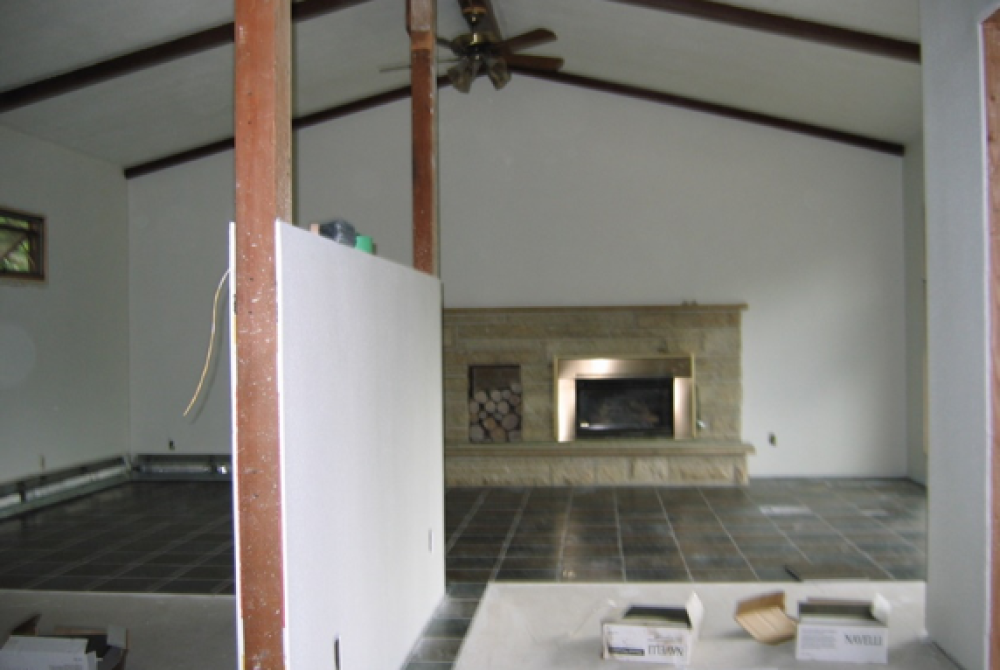
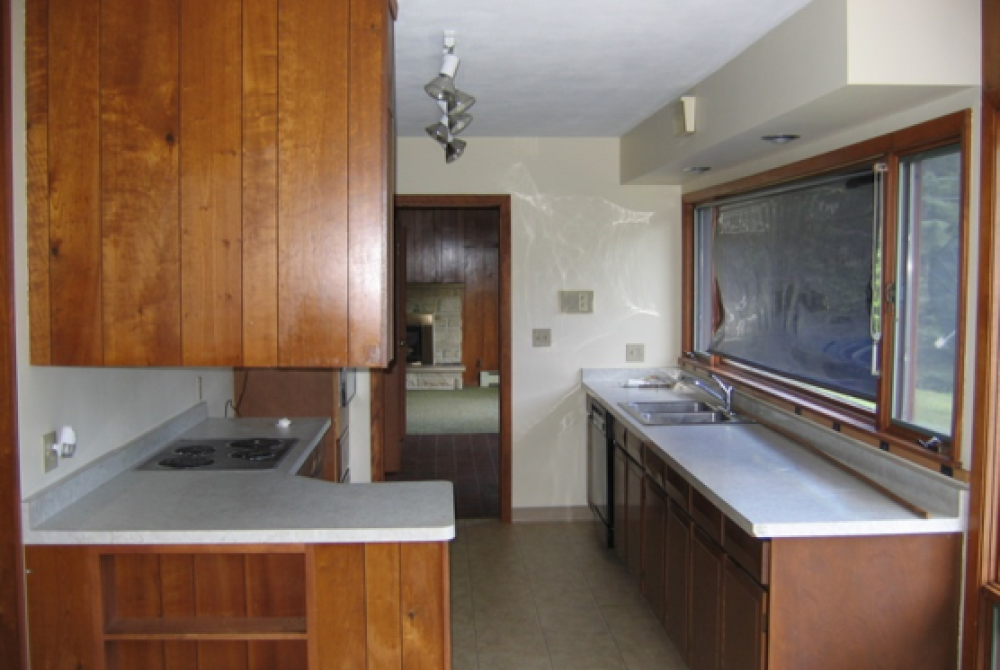
 Open Spaces – To take the best advantage of passive heating an open floor plan allows the warm air to penetrate freely into the home without the use of mechanical air flow systems. Our house had basically 4 rooms on the first floor when we moved in. Our retrofit opened the space up, allowing the large room to warm evenly.
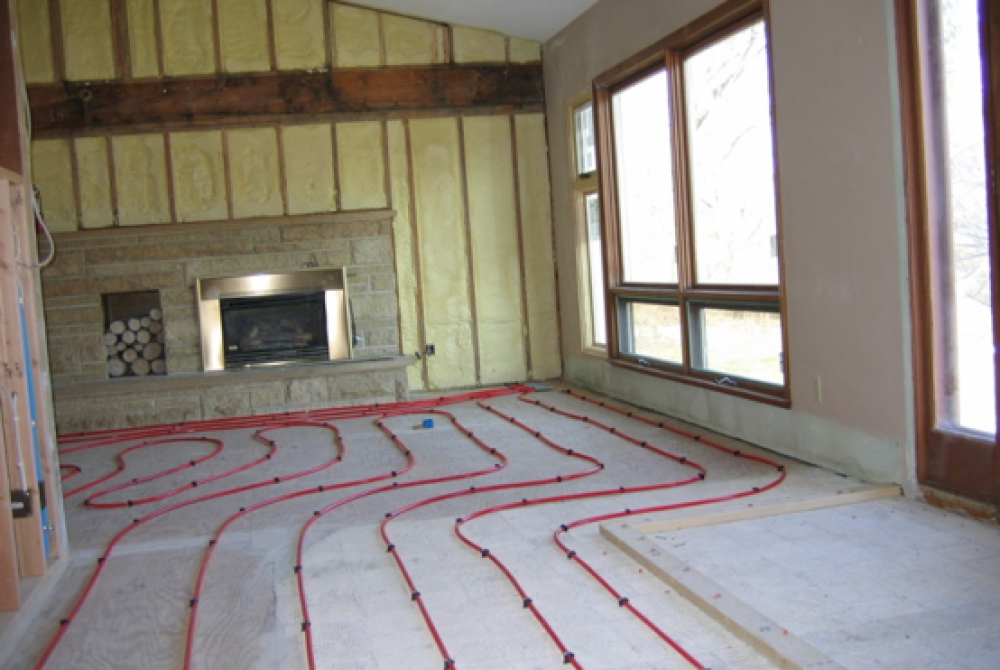
One thing we really liked about our house when we bought it was the hydronic baseboard heat. It’s warm but not dry. We were keen on a future solar thermal system so we tore up the carpet and installed a radiant floor embedded into self-leveling gypcrete. Once covered with 3/8 inch ceramic tile the floor added a significant amount of mass that can hold heat.
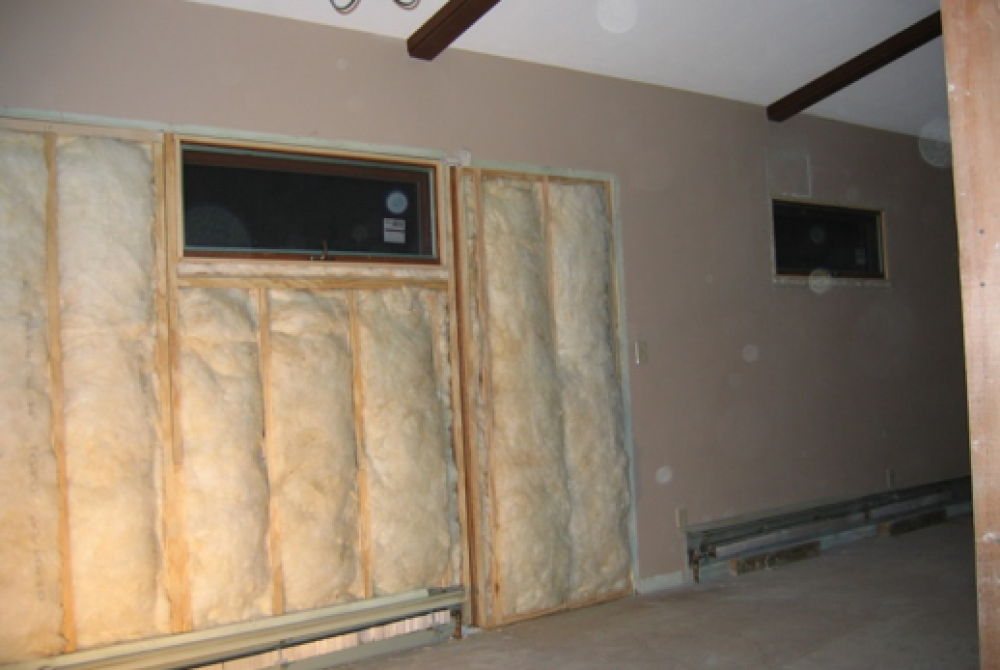
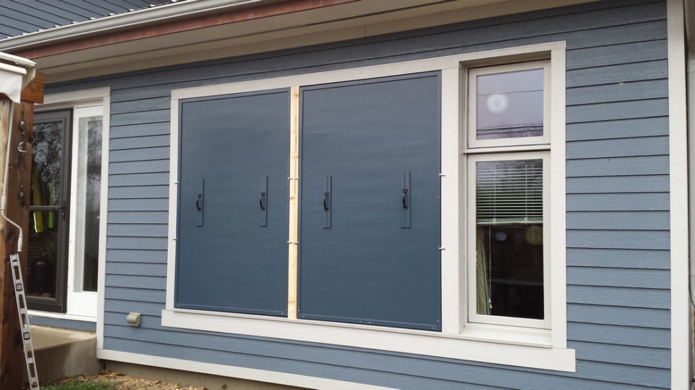
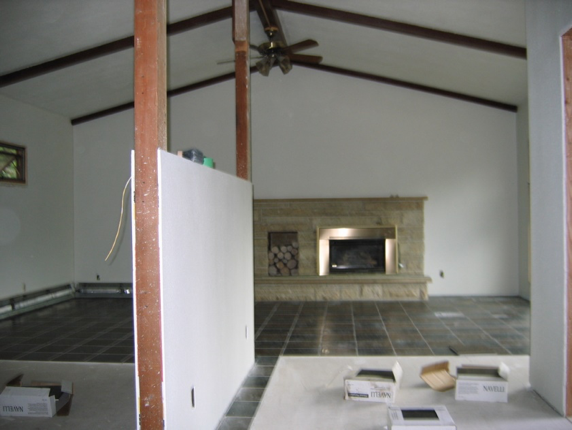 As the remodeling progressed, room by room, we removed large windows facing any direction but South. This maximizes our heat gain, and minimizes loss. (picture to the right)
This series of slides shows the general progression of opening the floor plan so our passive gains have room to migrate. We also selected a dark colored tile that would absorb more of the heat from the Sun.
 A vestibule “door lock” was added to the front door. The goal was to buffer heat loss when coming in and out of the door. It has turned out to add a lot of solar gain on sunny winter days. (picture to the left)
To prevent loss of heat at night, we use Warm Windows curtains, which about doubles the insulation value of the windows to around an R6. The curtains, made with high density hollow polyester fiber, and a metalized film which acts as a radiant barrier (think space blanket) are constructed to seal magnetically to the trim. In cold temperatures we do have some condensation and for our largest windows we use an R10 movable insulation panel. See the Energy Efficiency page (and blog post for details).
Solar PV
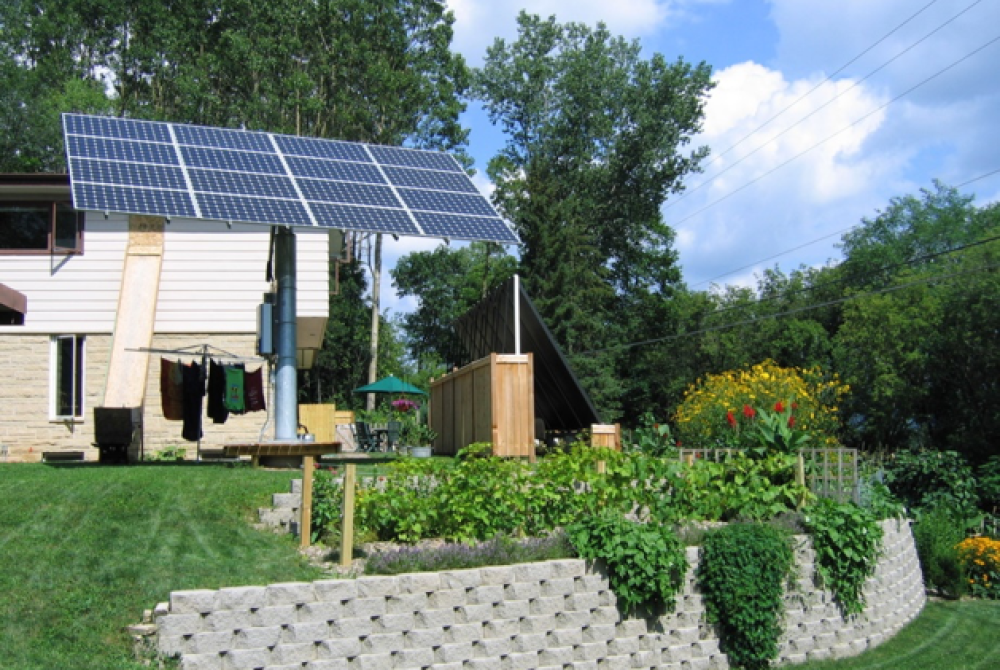
2009 Dual Axis Tracking PV array – In August of 2009 we began the installation of a 2.8 kW Dual Axis Tracking Solar Array. Its an amazing piece of technology that raises the solar panels 10 feet in the air, and follows azimuth and latitude to keep itself always perpendicular to the sun. That maximizes the electrical production, increasing the output from 30 to 40%. We have trees to the east, which block some of our solar window, and the tracker will allow us to make up for some of that shading. The tracker retires at night, turning to face the east. It ‘wakes up’ when the sun rises, and sensors allow it to track the sun during the day.
 Our system is grid tied, which means our electrical meter runs both ways. The house uses the electricity it needs, and the excess flows out through our meter and onto the grid. At night and on cloudy days we buy electricity from the grid.
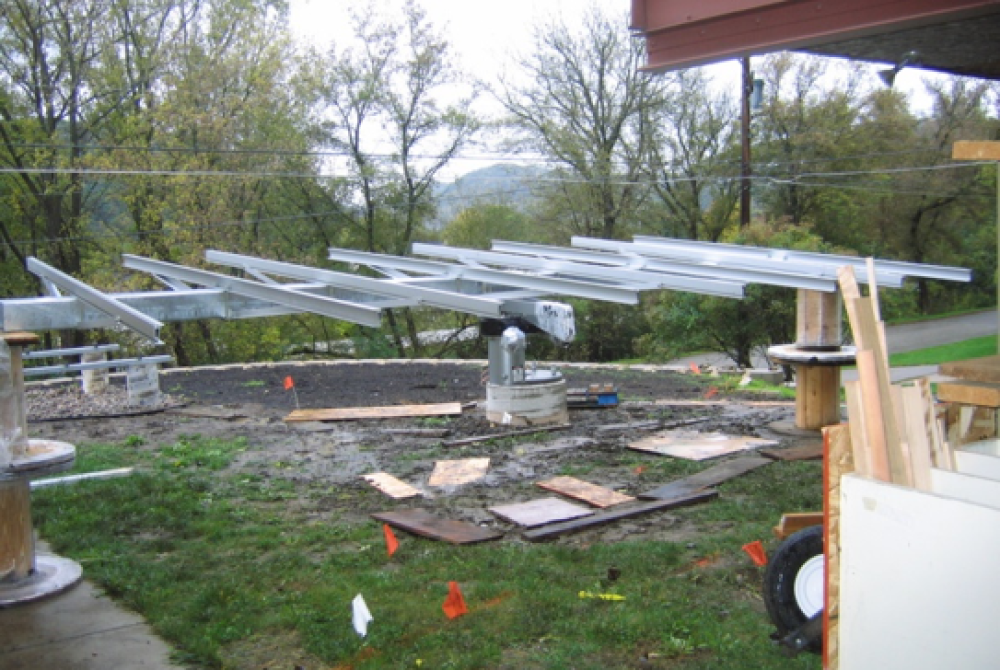
To construct the tracker we first had to sample the soil to make sure it was stable enough for the footing. A 20 foot core was taken analyzed and found suitable for the tracker footing. The footing itself is 30 inches wide and 8 feet deep with a 1/2 inch rebar cage and about 3 cubic yards of concrete. The 12 foot pole is bolted onto 1 inch thick threaded rod and was custom made of 1/2 inch galvanized steel. By law and code the array, (as with all PV arrays) is built to withstand a 90 mph wind. Extreme wet conditions in the fall of 2009 made for a longer than usual installation period.
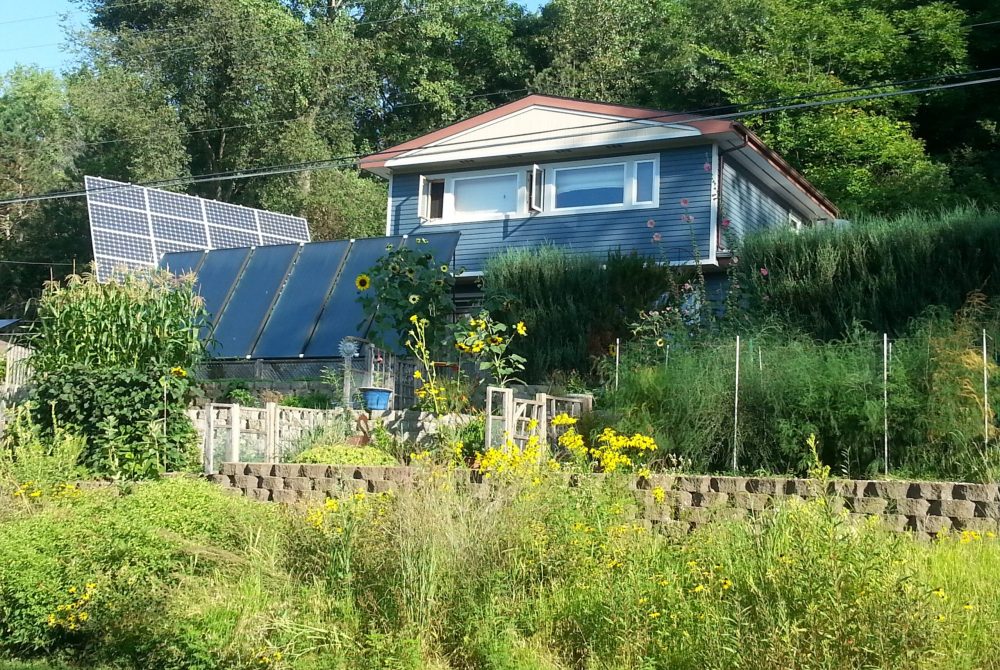
We’ve added 2 more kW of PV! In June 2013 we went live with a fixed tilt pole-mounted array adding an estimated 2700 kWhs to our annual electrical production. (With today’s technology, at the Latitude of Winona – you can expect each 1kW of ‘name plate’ PV panels, with zero shading, to produce about 1350 kW electricity annually.) Amazingly we learn that each individual panel in the new array will produce about 40% more power than the ones we installed in 2009, and will be about 50% of the price! And unlike our first solar array, this one uses Enphase Micro-inverters which will optimize the electrical output panel by panel. That way if there is some shading on a single panel, the rest will continue to output at their peak production. We can see on-line real-time output from the new array on the internet.
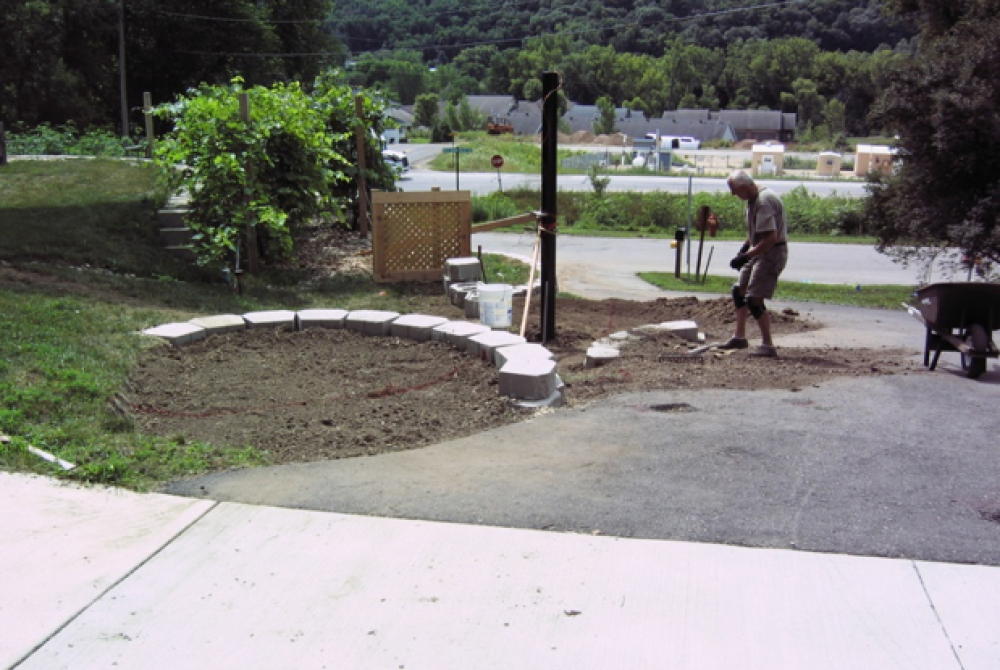
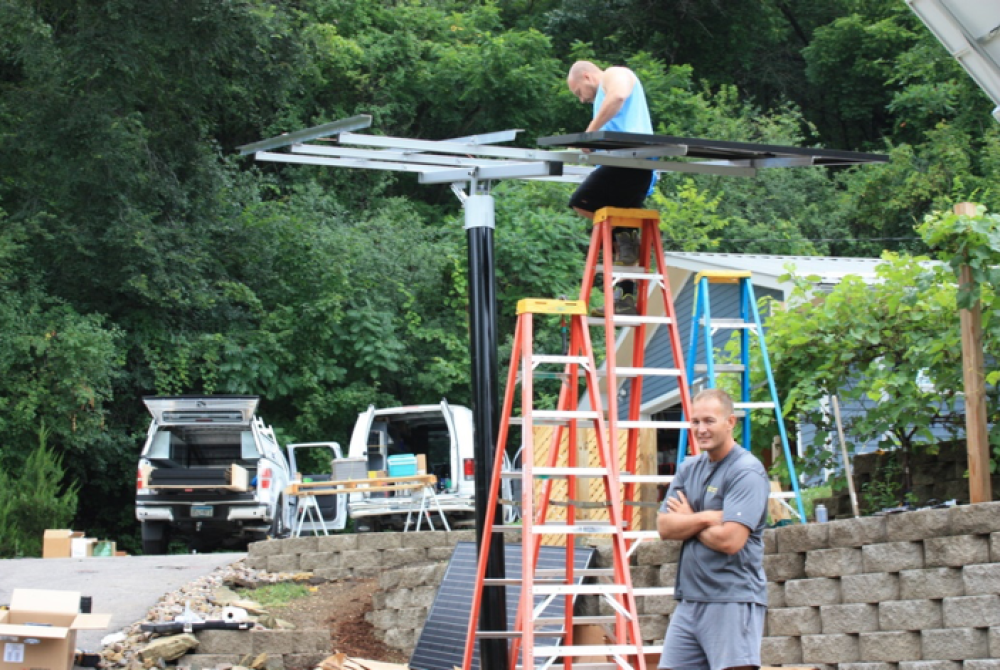
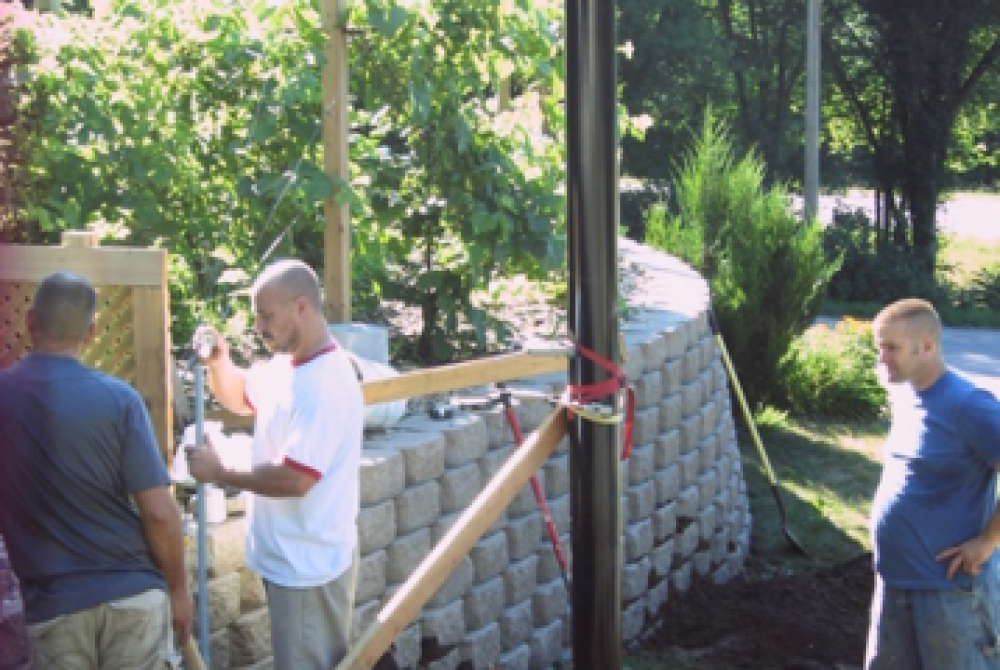
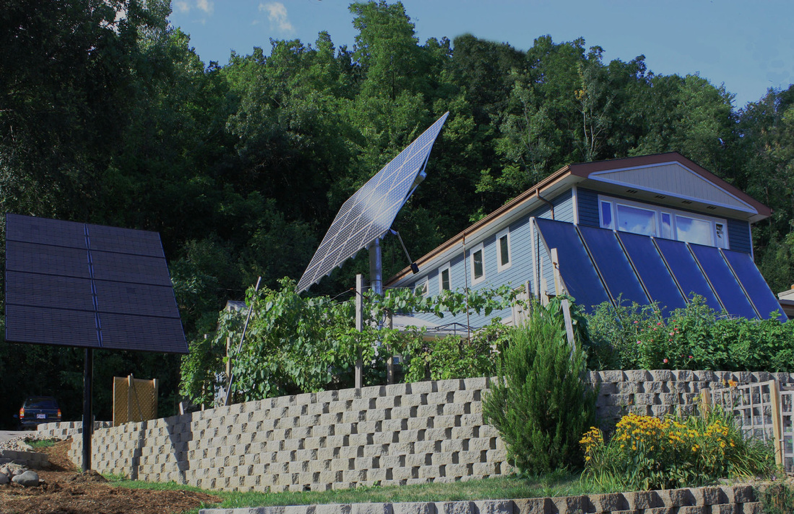 This shows a compilation of images of our second PV array installation we talk about at the top of the page. We took the liberty of landscaping rain gardens around it to catch run off from the driveway ramp and parking pad above. We should have enough additional production for those colder that usual winters and to possibly power a future electric car. This time we had local installer Winona Renewables LLC put up our panels.
 Movable Insulation Panels
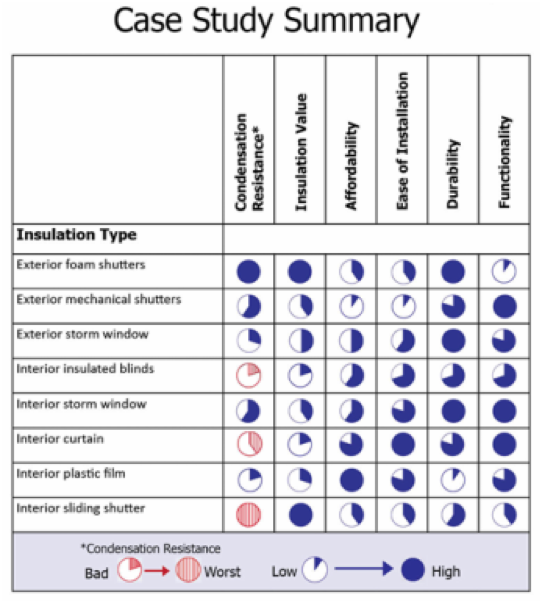
We have known for a long time that performance of windows could be greatly improved by insulating window systems, aka movable insulation. Research from back in the 1970’s indicated that 10 to 20% reduction in annual heating could be achieved by using an R10 insulating window treatment during the night time hours in a Minnesota climate. The savings were higher, the higher the window to floor ratio of the home. More recent research done by the Cold Climate Housing Research Center in Alaska has compared 8 types of window treatments from simple interior plastic film. storm windows, to exterior foam shutters with around an R7 value.
 Each of the possible treatments can provide significant insulation improvements, but most of the interior options cause condensation. Condensation happens when the interior window surface temperature is lowered, say by an insulating curtain, but the treatment does not fully seal interior air from that cool window surface.
 The advantage of placing insulated window coverings on the exterior of the home is that the interior surface of the window stays higher and condensation does not occur. We’ve been using Warm Windows curtains for 5 years and meticulously seal them with magnets around the window frame, but when outdoor temperatures are in the teens or lower we have frost on the interior of the windows.
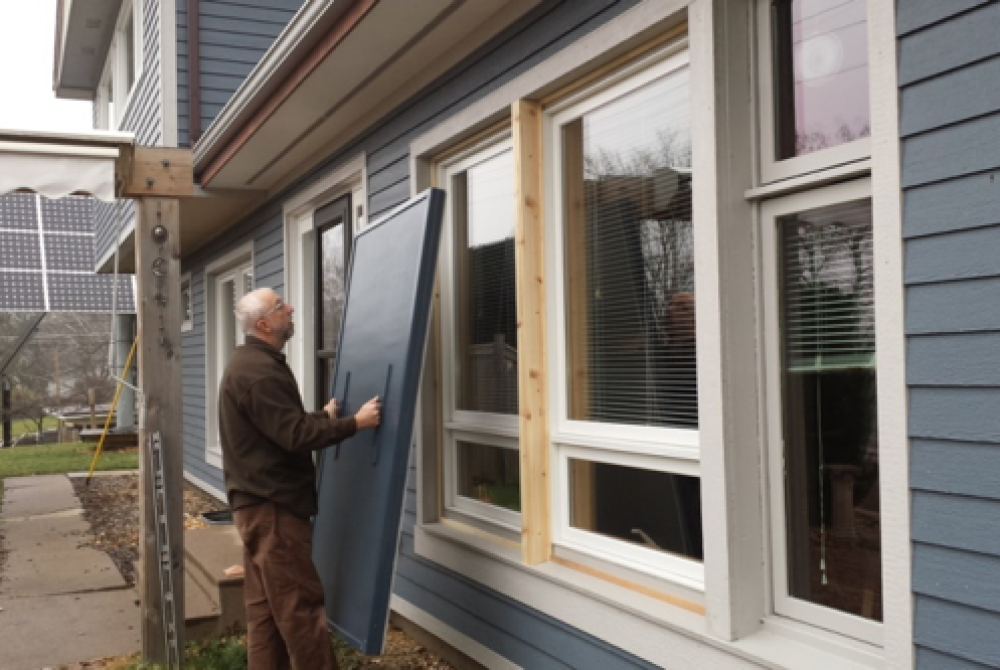
At our house we have concentrated our double pane glazing on the southern side of the house, and we have a glass to floor ratio of about 10% on our first floor. We’ve recently constructed new pressure fit exterior movable insulation panels to fit onto our large south windows. These should increase the R-value of the windows to around 14, reduce our air infiltration, and reduce our heating loads by 9%.
 Energy Monitoring
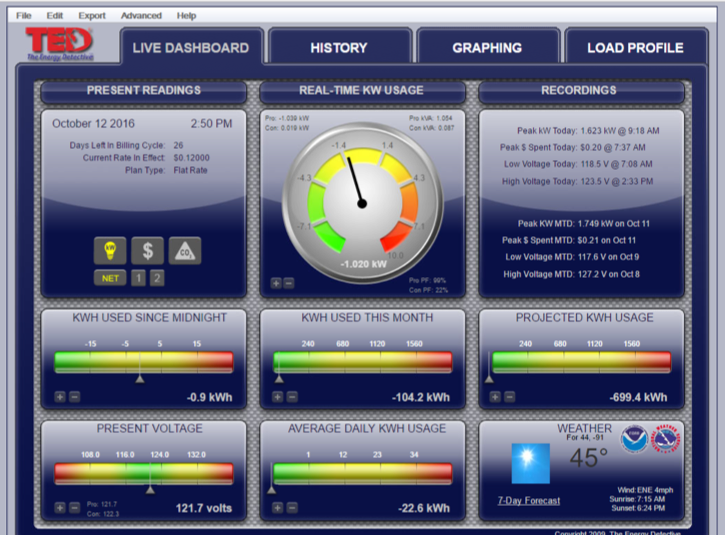
Behavior is possibly the “Holy Grail” of energy conservation. Early on we understood the need to reduce our consumption, but how do you reduce if you don’t know what is consuming? That is when we took the advice of our second PV consultant and installed a TED 5000 Home Energy Monitor. It allows us to track our PV solar production and our consumption. Once you get used to using it you can identify individual loads and understand how much energy each is consuming.
The monitor is one of a half dozen or so that can provide vital information to energy misers so they can pinpoint loads and make decisions about usage. Data from the TED is stored and the history can be downloaded into an Excel spreadsheet for additional graphical analysis. Or, the user can simply use the existing tool to create a date specific graph comparing production and consumption. Below is the actual production/net/consumption graph for the 15 day period September 15 2016 through September 30 2016. As you can see we are net producing on most days, (dark blue). Once the heating season comes along our “net” is applied by our utility company to our gas usage. We not net zero, yet, but we are pretty close.
With our system we use the electricity we’re producing first, then if we are producing excess it is sold back to the utility, (we’re grid tied), then in the evening we consume. An hourly graph would show the difference in production/consumption periods.

Over the past 6 years more than 800 middle school students have toured our home. We have participated in the Minnesota Renewable Energy Society 5 of the past 6 years, and have entertained classes from 3 local universities. In 2010 our home was featured in Home Energy magazine, (link here).
Chris Meyer is currently the Southeast Minnesota cordinator for the Clean Energy Resource Teams SECERTS. Both Paul and Chris have been instrumental in educating the local community about energy efficiency and renewable energy. Chris is a certified solar site assessor and Paul is a BPI building analyst. Both are focusing their retirement years on spreading the word about climate change and what individuals and communities can do about it.