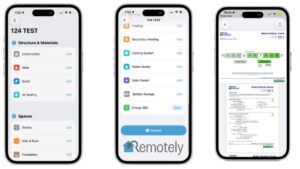
When I bought my house in West Michigan in 2016, I saw it as a blank canvas—a chance to transform a typical early-2000s home into a model of modern sustainability. Over the last decade, I’ve tackled nearly every system and detail, driven by a desire for health, comfort, resilience, and climate action. Here is the full story of my sustainable upgrades, told in first person and with as much detail as possible. Below the article is a full virtual tour I lead.
Getting Started: The Green Home Inspection (2016)
The very first step I took was commissioning a green home inspection, which included a DOE Home Energy Score, a blower door test (to assess air leakage), and a full review of water management, durability, and electrification potential. The home, built in 2002, performed slightly above code for its time, but had obvious deficiencies—especially in water management (no gutters, poor grading, problematic eaves) and some aging systems.
The inspection flagged missing carbon monoxide detectors, incandescent lighting, and recirculating kitchen ventilation that recirculated cooking pollutants. I also learned my HVAC was a 70% efficient gas furnace and an undersized, inefficient AC that struggled to cool the whole house. The water heater was an old natural-draft methane gas unit.
Immediate Fixes and Quick Wins (2016-2017)
My first actions were about safety and quick efficiency gains:
- I installed low-level CO detectors.
- I swapped every bulb for LEDs and installed 0.5 GPM aerators on bathroom faucets.
- I upgraded my HVAC filter from MERV4 to MERV8 and set the furnace fan to run continuously for 24/7 filtration. I also ran the bath fan for continuous exhaust ventilation, getting about 80 CFM.
When my old top-loading washer failed in 2017, I replaced it with a front-loading Energy Star washer. I installed steel-braided hoses (90% less leak risk than rubber) and learned to keep the washer door open after use to prevent mold, plus started using the time-of-use setting to wash with cleaner/cheaper grid power.
First Big Upgrade: Heat Pump Water Heater (2018)
In 2018, my gas water heater started leaking. Instead of frustration, I saw opportunity. I replaced it with a 240V Rheem Prestige heat pump water heater, the highest efficiency model available. This unit features leak detection, remote control, and energy monitoring, and allowed me to lock it into heat pump mode only (no resistance backup). I used the app to track usage, set the temperature to 140°F off-peak and 120°F on-peak, and learned the importance of regular maintenance—flushing the tank and condensate line, and cleaning the filter.
While I didn’t save much in utility bills (electricity is expensive here, gas is artificially cheap), my motivation was to electrify, improve health, and showcase new tech. The upgrade bumped my DOE Home Energy Score from 7 to 8. I saw no measurable difference in humidity, low or high depending on the season, from the unit’s “dehumidification” feature, and the unit has been very quiet despite what people say about them.
Major Overhaul: Full Electrification & Ventilation (2020-2021)
By 2020, I was ready for a complete overhaul. I did extensive planning: manual J load calculations using my energy audit data, multiple HVAC system and solar quotes, and careful financial modeling. I weighed a high-efficiency gas furnace/AC, a dual-fuel heat pump, ground-source (geothermal), and air-source heat pumps. Geothermal would have required killing mature trees and came with a high upfront cost. Air-source (cold climate) offered nearly the same performance for much less, so I went all in: I removed the gas furnace and AC, installed a cold-climate air-source heat pump, and went 100% electric with no backup resistance for heating. With that being said, for many households in Michigan on most of the utility grids, the current electric utility rates could make winter heating very expensive; thus, until we can get electric utility rate reform, the best option is to attach a cold-climate heat pump outdoors, similar to an AC to an indoor high-efficiency gas furnace.
I also replaced old bath fans with Panasonic WhisperGreen Energy Star models (modulating up to 100 CFM), and installed a new range hood with smart controls tied to an air quality monitor—so it automatically ramps up if smoke or particulates (PM2.5) are detected. To ensure healthy indoor air, I added a Panasonic cold-climate ERV (energy recovery ventilator) after testing my air quality during a summer heatwave and seeing my CO2 rise excessively. The ERV is rated at 100 CFM of balanced, filtered fresh air through MERV 13, ducted into my existing HVAC system. I tested and calibrated all ventilation with RedCalc software, using data from my blower door test and aiming for ASHRAE 62.2 standards.
Solar and Battery (2021-2025)
Once I’d addressed energy efficiency and electrification as much as I could, in 2021I had Green Panel install 3.96 kW of Panasonic panels (south-facing garage) with Enphase microinverters for granular monitoring and reliability. Later in 2025, as it became clear the tax credit would expire sooner and I needed a new roof, I expanded by an additional 6.1 kW for a full 9.7 kW system, having Green Panel add panels to the east and west after a new roof and removing the now-unneeded chimney (thanks to electrification). In both cases, Green Panel accurately predicted the solar energy savings I got in both projects.
During my first solar project, in 2021, the goal was to go for the full system on the roof originally. Still, because of frequent power outages, the utility’s new time-of-use peak program, and trouble getting the financing I needed for a full solar project, I removed the east and west panels from the scope. I added a whole-home battery (13.5 kWh) instead to the project to protect against power outages since solar does not work when the grid is down, and to help me stay off-peak during summer days to save money, which solar usually does unless a cloud passes by or I need an extra midday afternoon boost of power load.
One thing of note is that in the 2025 solar update, I had just over 10 kW planned; the installers showed up to install it too and could not fit it, and we had to remove it from the cost and the house, and out of pure luck that worked out because the utility late in the game decided to try to charge me like $5,000 for a new utility pole transformer to handle the 10 kW load! So with the panel removed, I dropped below 10 kW.
Another major reason I added more solar later in 2025 was that, in 2021, right as my solar project wrapped up, one of my fossil gas cars broke down permanently. While I wanted to go all electric at that time, I could not find anything in my budget that would get enough winter miles, so I picked up a 2017 Volt, which is a PHEV, and so that added a major unexpected electrical load to my house, which sometimes, in the middle of winter at night especially, or while running many appliances and charging the car, I can reach loads of 12 kW; contrast that with the average home that is probably running less than 1 kW. Thankfully, the home had a nice 200-amp panel, and the decommissioned hot tub freed up enough spaces for the level two car charger. But where the extra solar comes into play is that it is more cost-efficient to charge your home or vehicle with solar than to send it to your battery or the grid, and so now in the summer of 2025 I could fully charge my car in the middle of the day and power my house all the same time.
Water Conservation and Monitoring
Although I’m on a well (no direct water bill), I wanted to reduce aquifer drawdown and the water pump’s energy use. I replaced every toilet with a vacuum-assisted model: one single-flush at .8 gallons per flush and one dual-flush at .9 / .5 gallons per flush. These use less than half the current average flush rate of an existing home toilet, and toilets use the most water in a home. I replaced showerheads with 1.25 GPM units, and all appliances with Energy Star. I also installed a real-time water monitor with leak detection and temperature sensing. My Home Water Score improved from 1 (baseline) to 6 (Green Star Platinum level). My outdoor water use is effectively zero, as I don’t irrigate my Kentucky bluegrass or landscaped areas, and I shut down the automatic in-ground sprinkler system on the house had when I bought it; if another person owned this house, yard water usage would likely go up with more intentional watering. Over the last 5 years, I see our actual usage per year was roughly 53,000 gallons, compared to the average usage of 80,000 gallons for American households.
Air Quality, Radon, and Health
With COVID, wildfires, high CO2, and humidity issues, air quality became a science project for me. I got multiple air quality monitors tracking CO2, PM2.5, VOCs, humidity, radon, temp, pressure, and even mold risk, and tracked pre/post-upgrades. My first air quality monitor, added back in 2018, was so small I lost it, but it tracked and reported dew point, so I knew early on I had summer humidity issues in the basement and generally dry air in the winter, like most MI homes. I also ran a cheap radon test when I bought the home, and it came back under the American action level of 4 but above the rest of the world and the WHO, which suggests action at 2.4. And it was in the 3’s. My radon monitoring system confirmed that levels spiked, especially in the wintertime as expected, at times above safe levels (despite being outside the EPA risk zone). So, as part of my project, I invested in major indoor air quality system upgrades as reviewed above. One of those systems was a radon mitigation system, and I was reminded that just because a system is installed doesn’t mean it works. Before I got my battery, a power outage knocked out the radon fan, and I would have never known if my air quality radon monitor hadn’t alerted me to levels exceeding the safe threshold!
Additionally, I upgraded to MERV16 filtration on my main HVAC and MERV13 on the ERV intake. I monitor humidity and mold risk with sensors in the basement and utility room; after seeing persistently high dew points, I added a whole-home dehumidifier (I should have done it as part of the main project, not as an add-on). It keeps the basement at 40-45% RH. According to the monitor, mold risk is now virtually zero, and I get automated alerts if anything spikes.
Noise, Comfort, and Other Upgrades
I measured noise before and after upgrades: my old gas furnace ran at nearly 59 dBA in the living room; the new heat pump, even at full speed, is under 35 dBA. The sound of my heat pump water heater hasn’t been that loud for being in a utility closet off the main living area. The dishwasher I got is also low dBA rated and is very quiet despite the open floor plan. But the biggest issue was the range hood vent, which was installed rectangularly instead of round. This caused high static pressure, raising the dBA rating and sound levels above what the device is rated for, and it was very annoying when cooking. The HVAC came back and fixed it, and now it’s much quieter.
Another part of my roofing and solar project in 2025 included replacing two drafty entry doors with insulated fiberglass units, foaming and sealing the frame, and repairing some flooring. I immediately noticed the entryway was no longer too cold or warm, and it wasn’t as humid in the summer. Since the entry is near the main living room, this helped the space stay cooler in the hot summer sun.
Lessons Learned and what I would like to do next
Looking back, I regret spending on motion sensor switches for all my lights because LED’s in general, use so little energy it didn’t matter. With the same amount of money I spent on that, I could have budgeted for a heat pump dryer (instead of condensing electric resistance, which uses a lot of energy and overheats the house in summer). In addition, during my first project I wish I had prioritized humidity reduction in my basement, perhaps spending funding on sealing a sump pump to prevent moisture and re-insulating and airsealing the exposed rim band joist in my crawlspace, which currently just has fiberglass batt shoved into it.
Looking ahead, dealing with crawlspace humidity and condensate while air sealing is my next priority; this should let me reduce dehumidifier use, significantly cut energy use, and extend its life. Once that is taken care of, I could duct the dehumidifier into the ductwork to help maintain whole-home humidity and perhaps turn up the heat pump AC in the summer.
From there, I would like to switch my remaining gas vehicle to an all-electric car and then someday maybe insulate my house with two inches of rigid wood insulation and either add triple-pane windows or add interior storm windows to my current windows.
If the new electric car I get cannot do Vehicle-to-Home power, I’d like to consider another whole-home battery system to avoid sending so much power back to the grid in the summer and instead stay off the grid entirely throughout the summer.
Not including the dehumidifier at the outset was another oversight.
Financing
I funded all this through a blend of:
- Mortgage refinancing (including a construction loan) using a Green appraisal addendum during COVID low mortgage rates
- Michigan Saves green bank loans in 2025
- Utility rebates and federal tax credits for solar and doors.
I worked with a lender willing to count the value of green upgrades in the appraisal, and Michigan law prohibits higher property taxes for these energy improvements, keeping my home mortgage payments down.
Results and Looking Ahead
My home is now GreenStar Homes Platinum Certified, DOE Home Energy Score 10/10, and Pearl Platinum certified. Home Water Score of 6 out of 10. Combined home and vehicle energy costs are a third of the US average, and my carbon footprint has plummeted. Every system is monitored, and I continue to share data, lessons, and updates on my blog and through the GreenHome Institute.